OpenvSwitch
You are viewing the ZenPack Archive
This page is part of the ZenPack Archive. Archived ZenPacks may not be compatible with your version of Zenoss Service Dynamics or Zenoss Cloud.
Open Source
This ZenPack is developed and supported by Zenoss Inc. Contact Zenoss to request more information regarding this or any other ZenPacks. Click here to view all available Zenoss Open Source ZenPacks.
Organization
Zenoss, Inc.
License
GNU General Public License, Version 2, or later
Name
ZenPacks.zenoss.OpenvSwitch
More Information
Git Sources (For Cloning)
Applications Monitored
Open vSwitch (2.1.3+)
Background
This ZenPack provides support for monitoring OpenvSwitch.
Releases
Version 1.1.1- Download: Released on 2017/04/20: Compatible with Zenoss Core 4.2.x, Zenoss Core 5.0.x, Zenoss Core 5.1.x, Zenoss Core 5.2.x, Zenoss Resource Manager 4.2.x, Zenoss Resource Manager 5.0.x, Zenoss Resource Manager 5.1.x, Zenoss Resource Manager 5.2.x
Version 1.1.0- Download: Released on 2015/06/01: Compatible with Zenoss Core 4.2.x, Zenoss Core 5.0.x, Zenoss Resource Manager 4.2.x, Zenoss Resource Manager 5.0.x
Features
The features added by this ZenPack can be summarized as follows. They are each detailed further below.
- Discovery of relevant components.
- Performance monitoring.
- Service impact and root cause analysis. (Requires Zenoss Service Dynamics)
- Reporting
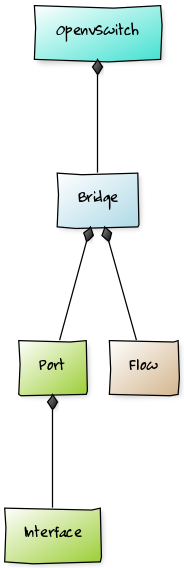
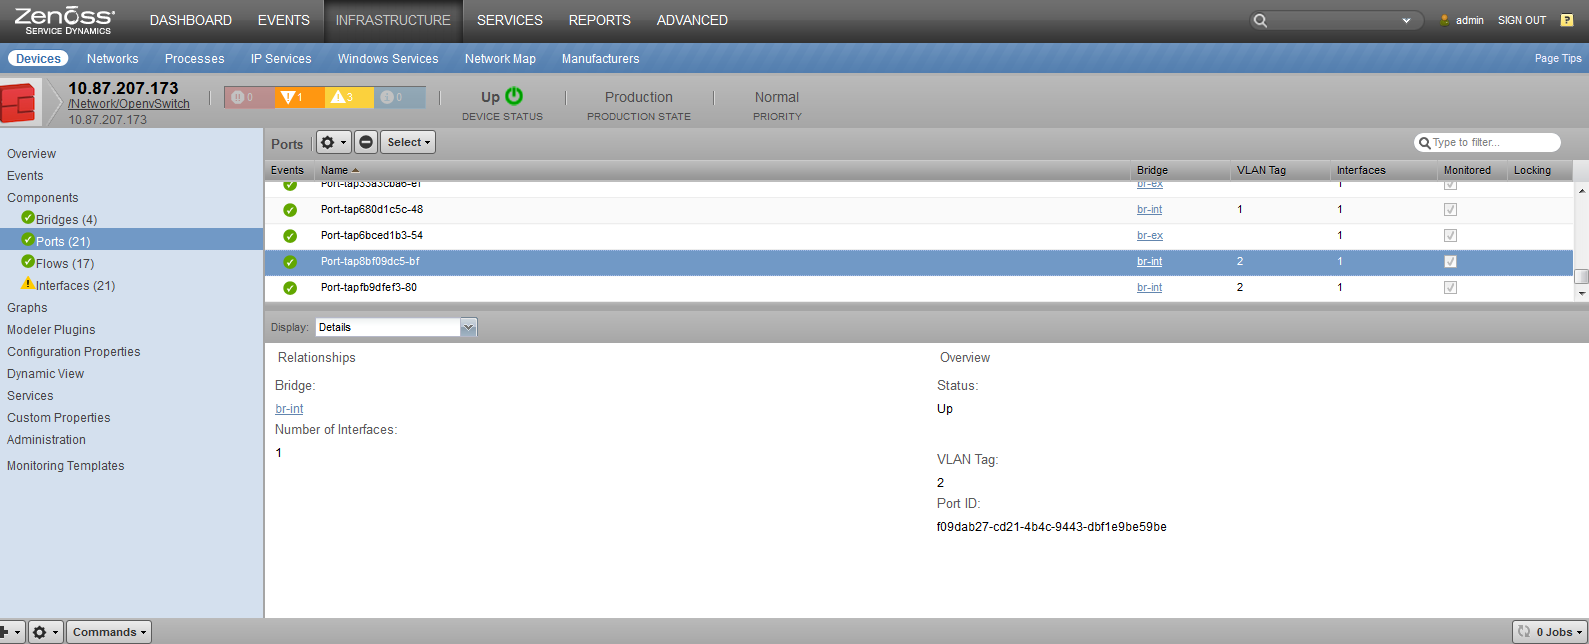
Discovery
The following components will be automatically discovered through the Open vSwitch host, username and password you provide.
- Open-vSwitch
- Bridge
- Port
- Flow
- Interface
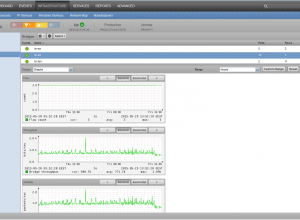
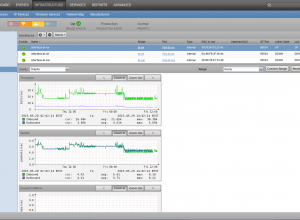
Performance Monitoring
The following metrics will be collected every 5 minutes by default.
Bridge
- Total number of ports
- Total number of flows
- Total number of interfaces
Interface
- Number of incoming bytes
- Number of outgoing bytes
- Number of incoming packets
- Number of outgoing packets
- Number of packet collisions
- Number of incoming packet dropped
- Number of outgoing packet dropped
- Numbef of CRC errors
- Numbef of incoming packet errors
- Numbef of outgoing packet errors
- Numbef of incoming frame errors
- Numbef of incoming buffer overrun errors
Usage
Adding Open vSwitch Endpoint
Use the following steps to start monitoring Open vSwitch using the Zenoss web interface.
-
Navigate to the Infrastructure page.
-
Choose Add a Single Device... from the add device button.
-
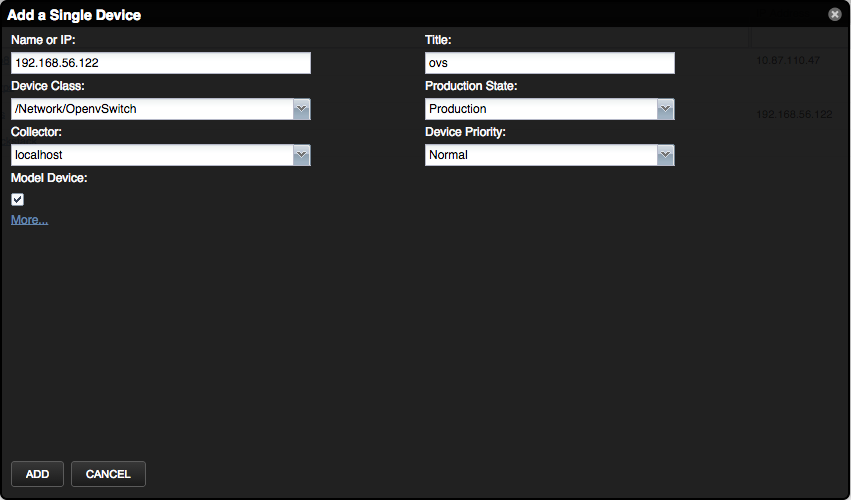
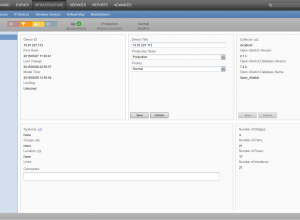
Fill out the form.
- Name or IP must be either the IP address for the Open vSwitch host, or a FQDN that can be resolved to the host IP address.
- Title can be any unique Zenoss device name. See note below.
-
Select /Network/OpenvSwitch from the dropdown list for Device Class
-
Click ADD.
The Title field should not be empty; it should be a unique device name within the Zenoss environment. The device's IP address or device's hostname should not be used as the title either. This is especially important if you are adding another device that share the same IP address or hostname that already exist on another device. Not doing this may result in devices with the same name conflicting with each other. (e.g. attempting to model device would show modeling results that belong to another device OR device would show relations that do not belong to that device)
Adding an Open vSwitch Endpoint with Zenbatchload
You can add an OVS endpoint by using the zenbatchload command:
batchload <filename>
where the file should have the format:
/Devices/Network/OpenvSwitch <device name> setManageIp='<ip address>', zCommandUsername='<username>', zCommandPassword='<password>'
For example:
/Devices/Network/OpenvSwitch net.ovs setManageIp='10.4.1.21', zCommandUsername='zenoss', zCommandPassword='secret_pass'
Installed Items
Installing this ZenPack will add the following items to your Zenoss system.
Configuration Properties
- zPythonClass
Device Classes
- /Network/OpenvSwitch
Modeler Plugins
- zenoss.ssh.OpenvSwitch
Monitoring Templates (all in /Network/OpenvSwitch)
- Bridge
- Interface
Command Parsers
- ZenPacks.zenoss.OpenvSwitch.parsers.BridgeStatistics
- ZenPacks.zenoss.OpenvSwitch.parsers.InterfaceStatistics
To start monitoring your Open vSwitch server you will need to setup SSH
access so that your Zenoss collector server will be able to SSH into
your Open vSwitch server(s) as a user who has permission to run the
ovs-vsctl command, and /var/run/openvswitch/db.sock without TTY.
This almost always means the root user. In addition, TTY must not be
required for the user. See the Using a Root User section below for
instructions on relieving root users from having to use TYY. See the
Using a Non-Root User section below for instructions on allowing
non-root users to run Open vSwitch.
zProperties
- zCommandUsername
- zCommandPassword
- zKeyPath
The zCommandUsername property must be set. To use public key
authentication you must verify that the public portion of the key
referenced in zKeyPath is installed in the ~/.ssh/authorized_keys
file for the appropriate user on the Open vSwitch server. If this key
has a passphrase you should set it in the zCommandPassword property.
If you'd rather use password authentication than setup keys, simply put
the user's password in the zCommandPassword property. You should then
add the zenoss.ssh.OpenvSwitch modeler plugin to the device, or device
class containing your Open vSwitch servers and remodel the device(s).
Using a Root User
This ZenPack requires the ability to run the ovs-vsctl command,
ovs-ofctl command, and ovsdb-tool command remotely on your Open
vSwitch server(s) using SSH. By default, these commands are only allowed
to be run locally. To remotely run theses commands, the root use must
not be required to use TTY.
- Install the
sudopackage on your server. -
Allow root user to execute commands via ssh without a TTY.
-
Run
visudoas root. -
Find the line containing
root ALL=(ALL) ALL. -
Add this line underneath it:
Defaults:root !requiretty -
Type ESC then
:wqto save the sudo configuration.
-
Using a Non-Root User
This ZenPack requires the ability to run the ovs-vsctl command,
ovs-ofctl command, and ovsdb-tool command remotely on your Open
vSwitch server(s) using SSH. By default, these commands are only allowed
to be run by the root user. Furthermore, this ZenPack expects these
commands be in the user's path. Normally this is only true for the root
user.
Assuming that you've created a user named zenmonitor on your Open
vSwitch servers for monitoring purposes, you can follow these steps to
allow the zenmonitor user to run ovs-vsctl command, ovs-ofctl
command, and ovsdb-tool command.
- Install the
sudopackage on your server. -
Allow the
zenmonitoruser to runovs-vsctl,ovs-ofctl.-
Run
visudoas root. -
Add the following line to the bottom of the file.
zenmonitor ALL=(ALL) NOPASSWD: /usr/sbin/ovs-vsctl, /usr/sbin/ovs-ofctl -
Type ESC then
:wqto save the sudo configuration. - Allow
zenmonitorto execute commands via ssh without a TTY. -
Run
visudoas root. -
Find the line containing
zenmonitor ALL=(ALL) NOPASSWD: /usr/sbin/ovs-vsctl, /usr/sbin/ovs-ofctl. -
Add this line underneath it:
Defaults:zenmonitor !requiretty -
Type ESC then
:wqto save the sudo configuration.
-
Zenoss Analytics
This ZenPack provides additional support for Zenoss Analytics. Perform the following steps to install extra reporting resources into Zenoss Analytics after installing the ZenPack.
- Copy analytics-bundle.zip from
$ZENHOME/ZenPacks/ZenPacks.zenoss.OpenvSwitch/analytics/on your Zenoss server. - Navigate to Zenoss Analytics in your browser.
- Login as superuser.
- Remove any existing OpenvSwitch ZenPack folder.
- Choose Repository from the View menu at the top of the page.
- Expand Public in the list of folders.
- Right-click on OpenvSwitch ZenPack folder and choose Delete.
- Confirm deletion by clicking OK.
- Add the new OpenvSwitch ZenPack folder.
- Choose Server Settings from the ''Manage' menu at the top of the page.
- Choose Import in the left page.
- Remove checks from all check boxes.
- Click Choose File to import a data file.
- Choose the analytics-bundle.zip file copied from your Zenoss server.
- Click Import.
- Click Close to close Import page
You can now navigate back to the OpenvSwitch ZenPack folder in the repository to see the following resources added by the bundle.
Domains
- OpenvSwitch Domain
Domains can be used to create ad hoc views using the following steps.
- Choose Ad Hoc View from the Create menu.
- Click Domains at the top of the data chooser dialog.
- Expand Public then OpenvSwitch ZenPack.
- Choose the OpenvSwitch Domain domain.
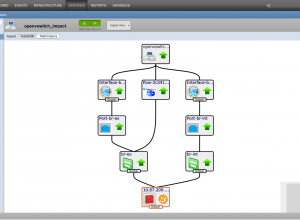
Service Impact and Root Cause Analysis
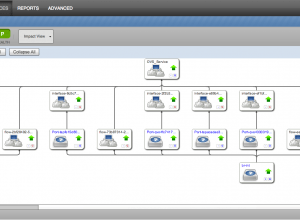
When combined with the Zenoss Service Dynamics product, this ZenPack adds built-in service impact and root cause analysis capabilities. The service impact relationships are automatically added. These will be included in any services that contain one or more of the explicitly mentioned components.
Since the class structure of Open vSwitch is simple, its Impact structure is nearly identical to the class structure shown above.
Recommended Impact Setup
Since most components will be related to Interfaces we recommend:
- Navigate to Services (Impact)
- Add a Dynamic Service to your Services tab
- Add all Interfaces to the Dynamic Service
- Optionally add all Flows to the Dynamic Service
Impact Relations
Component failures will affect Impact as follows:
- OpenvSwitch endpoint impacts associated Bridges
- Bridge impacts associated Ports and Flows
- Port impacts associated Interfaces
Changes
1.1.1
- Upgrade ZenPackLib to 1.2.0
- Change over to new ZenPackLib format for zenpack.yaml
- Add OpenStack Integration (OSI 2.1.1)
- Add configuration check for openstack_neutron_integration (OSI 2.1.1)
- Fix compatibility with Layer2 1.1.0 and later (ZEN-22790, ZPS-871)
1.1.0
- Initial Release